
Black Box Terrain, Part 2
Black Box Terrain, Part 2
Ya better run, ya better take cover!

In our first project, we built some “topography,” to give our wilderness battles height and depth. This time, we’ll use some different materials to build… well, built-things.
These are NOT village terrain, nor are they intended to be. I am too busy and too budget-conscious to mess with that. No - as before, these are tools that will give our players something to anchor their imaginations onto; something concrete and reusable that you, the DM, can paint a scene within. They’ll also encourage your players to leverage a tool that’s virtually impossible to conceptualize on a 2D-only map: Cover.
Take Cover!!!!!!!

Cover is a defensive mechanic available in just about every battle-oriented TTRPG. It allows players (or baddies!) to “take cover” behind walls, trees, boulders, etc. to boost their AC, reflex saves, stealth rolls, and similar stats. It encourages players (and DMs) to integrate strategy into their battle, since it’s no longer a matter of just running up and hitting things - you might want, or even need, that defensive boost in order to make it through battle.
Unfortunately, cover is a difficult concept for newer players to grasp, especially if you’re playing on a virtual tabletop (VTT), a wet-erase map, or even a detailed printed map. Again, we have a disconnect between what can be described in a few, reasonably interesting lines of narration, what exists on the map but isn’t necessarily understood by the players, and what it’s possible for players to do during battle.

Looking at the battle-map above, a new player will see a couple of important things, but probably will miss many others. The most important thing they’ll see are the walls - the size and shape of the room. Sounds basic and hardly worth mentioning, except that these set the bounds of your battle - you can only go this far in this direction, unless something astounding happens.
Next they’ll see the feast table. Its placement means there’s no clear path to the throne - they’ll need to go around it. Maybe, maybe a new player will get really inventive and flip the table to take cover behind it, which is honestly exactly why it’s there.
But after that? The columns, the tables, the multiple thrones? That map there was effortful, for me, and practically none of those details will get used for the reason I included them - to provide cover and support more strategic battle. 95% chance that at least one of my players will attempt to run through the feast table, regardless of the other player who flipped it and is using it for cover.
The solution?
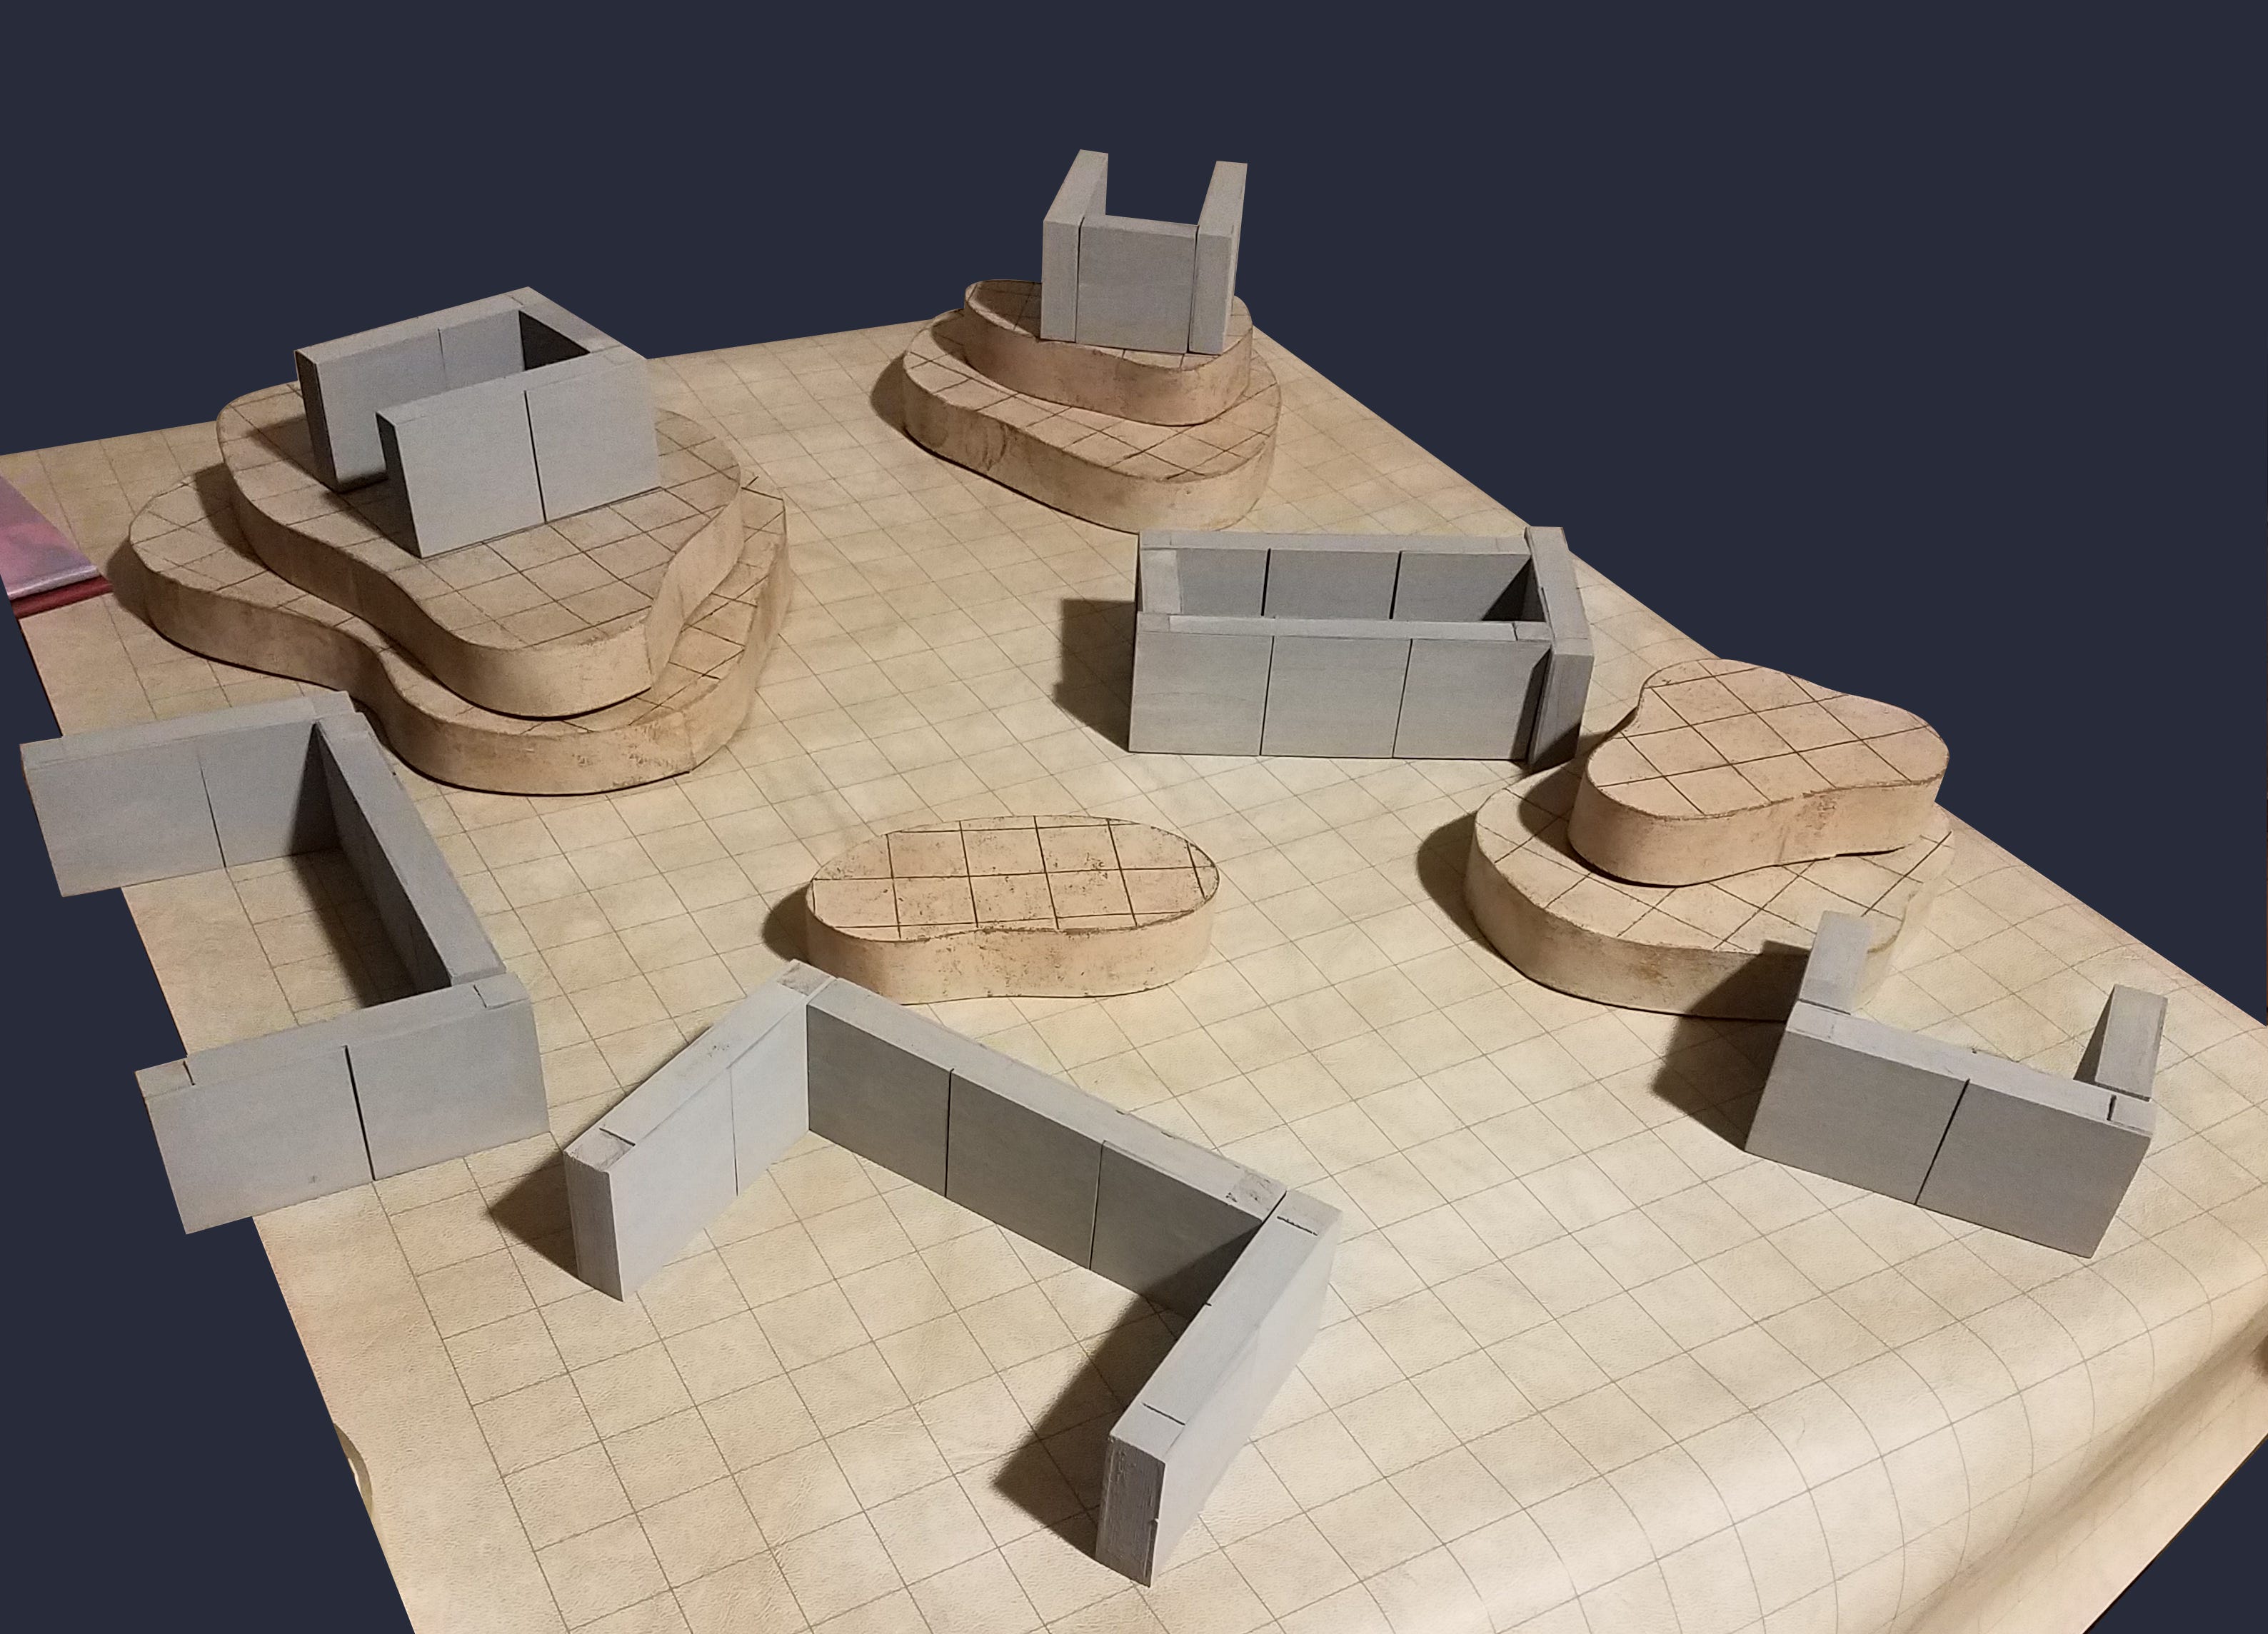
Black Box Terrain V2 - Walls ‘n stuff

Supplies:
A pack of these 12”x1/2”x1/2” square dowels
A collection of laser-cut plywood squares - I used 2”x2”s. Or you could use cereal box cardboard again, honestly.
A ruler
Razor saw
Cyanoacrylate glue (superglue)
Sandpaper
Paint
Step 1: Plan
First, consider your materials. I wanted to use those 1/2” square dowels as the frames for my shapes, because they were a) mostly square, and b) pretty uniform, which meant that c) I wouldn’t need to do too much to make a mostly square, pretty uniform final product. But because my dowels were 1/2” square, I needed to account for that bulk when it came to framing out the walls.

I chose the 2”x2” laser-cut plywood, again for the uniformity and lack of processing required; this has the added benefit of relating directly to the 1”:5’ scale common to TTRPGs. A building wall is approximately 10 feet high (or 2 inches).
Then it was a matter of calculating sizes of the dowels I would need to cut in order to make solid shapes. I ended up with the following measurements:
2”x2”: Two 2-in dowel lengths, two 1-in dowel lengths
2”x4”: Two 2-in dowel lengths, two 3-in dowel lengths
2”x6”: Two 2-in dowel lengths, two 5-in dowel lengths
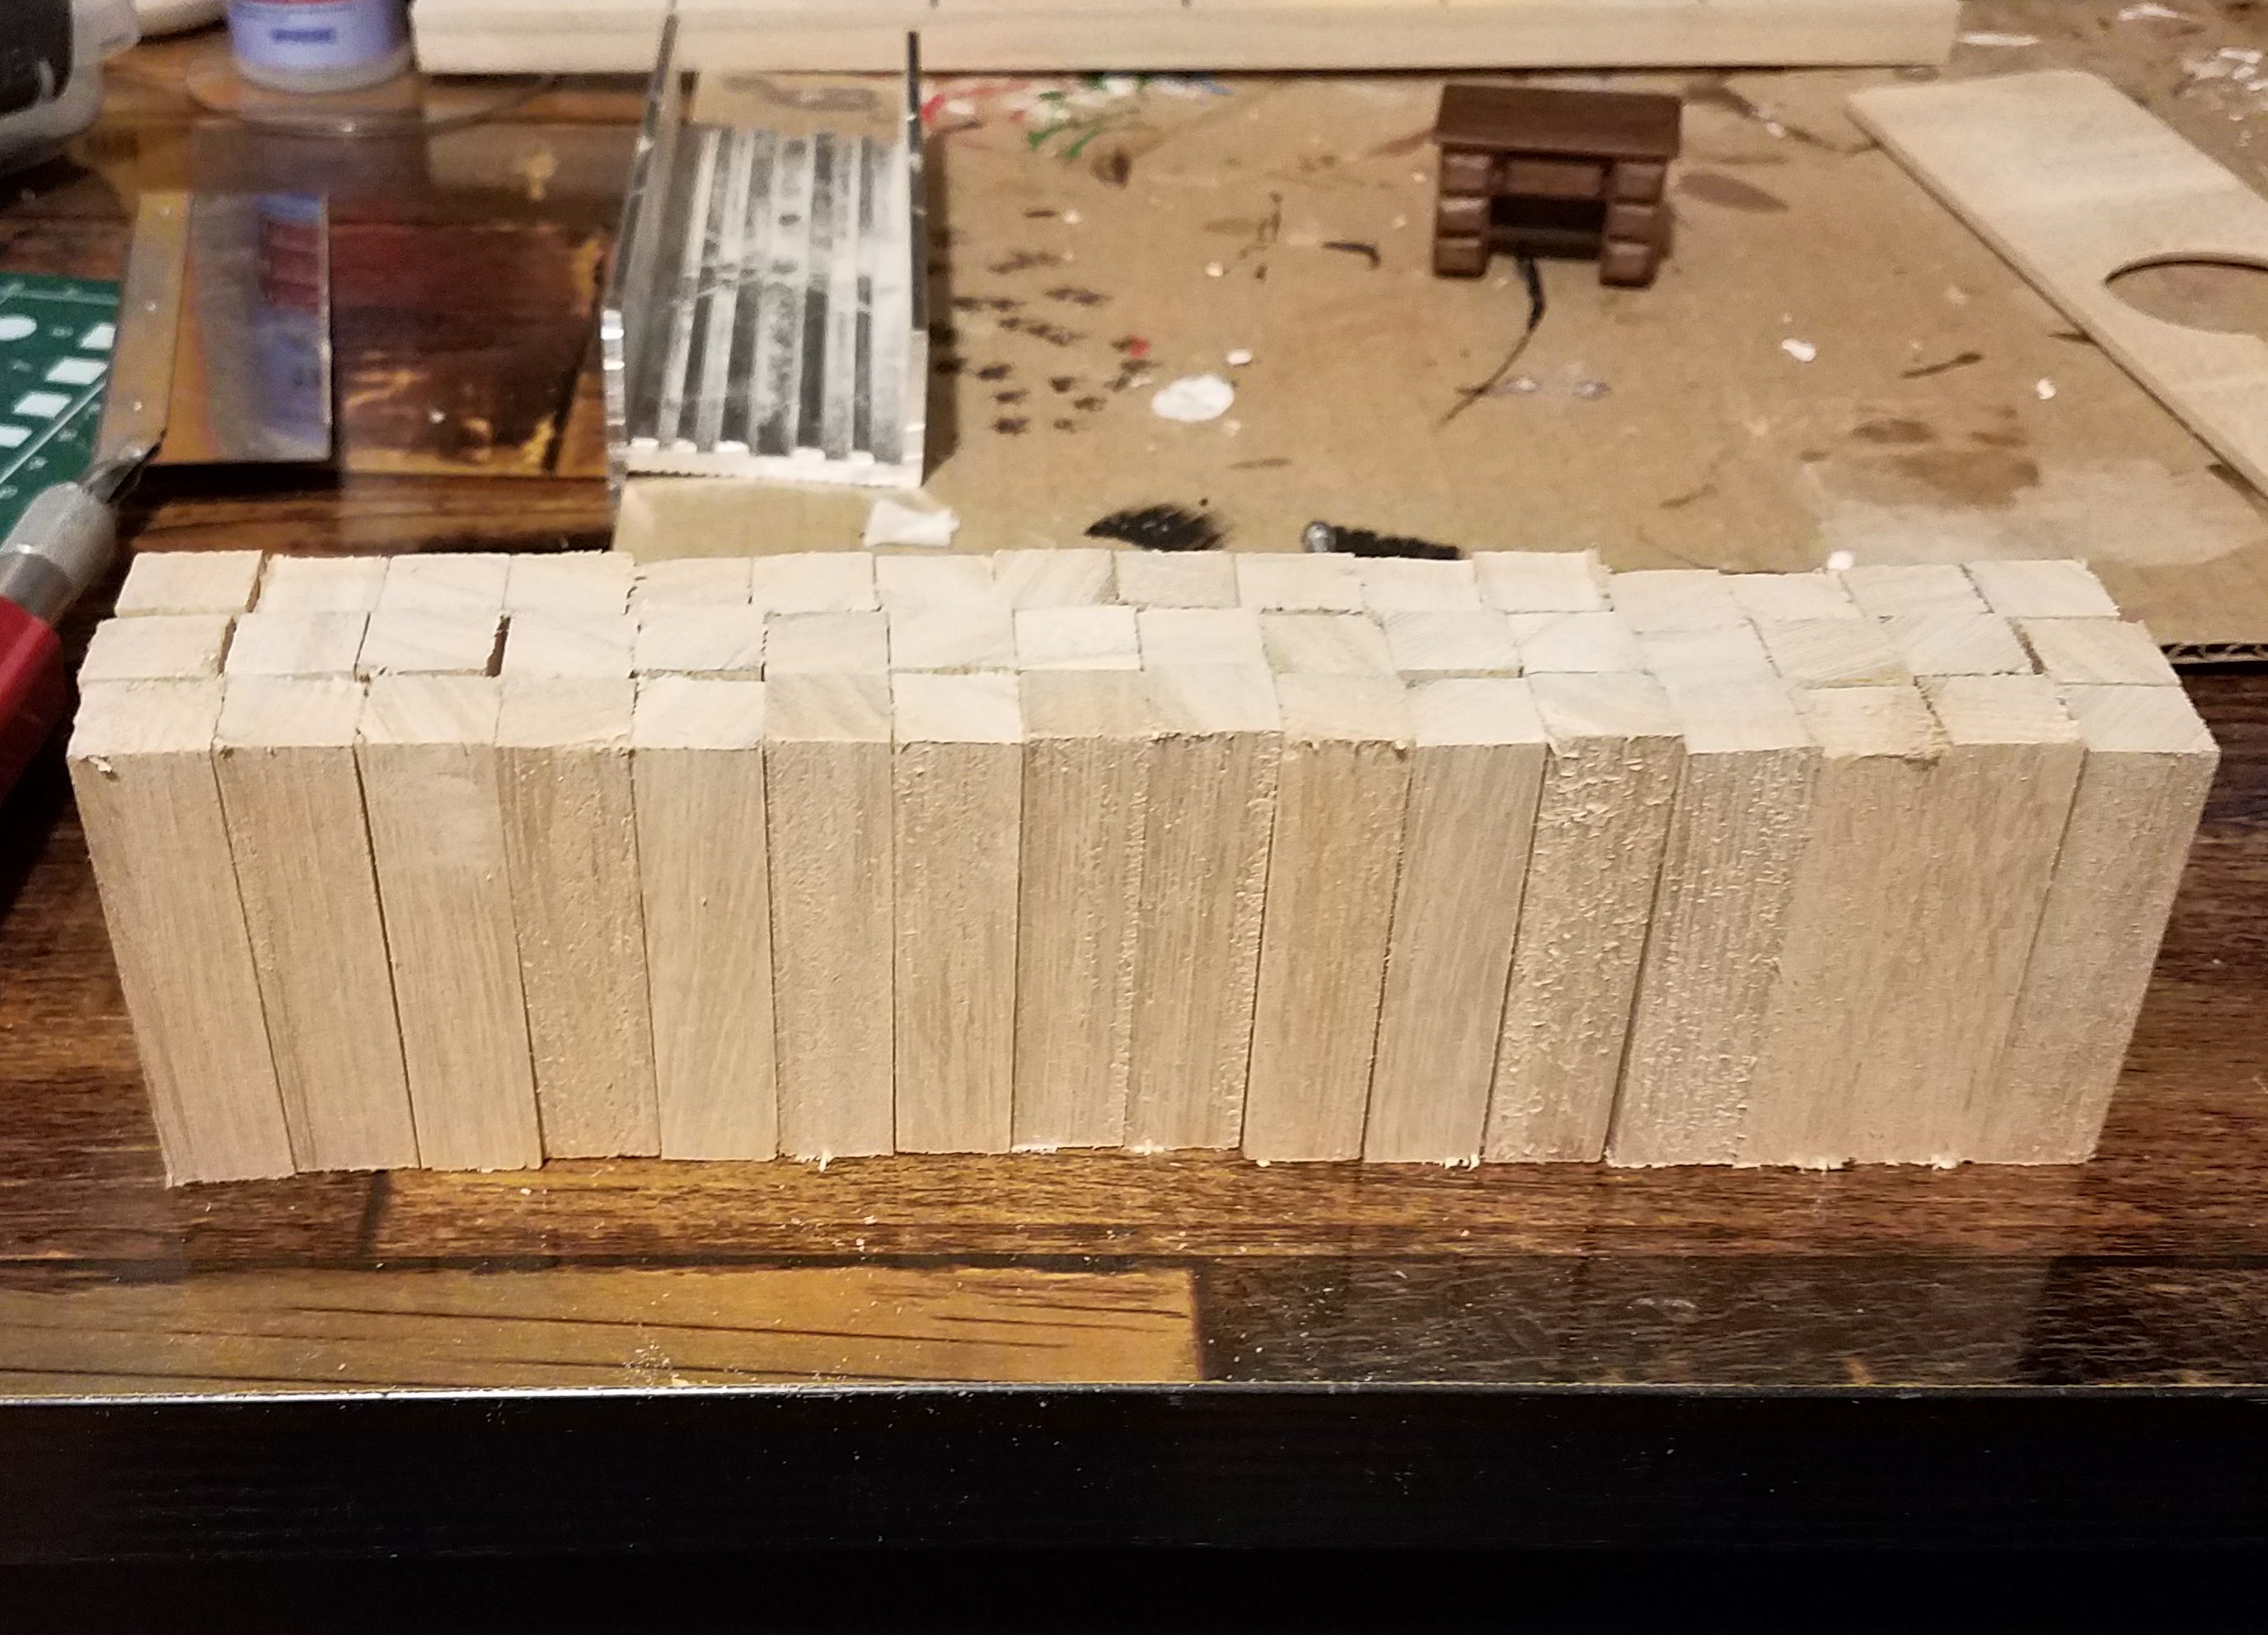
Step 2: Measure
What it says on the tin. Since the dowels are pretty much the same height, I stacked them closely so I only had to measure three or four times before marking my cut, instead of measuring three or four times per beam. Make sure your measurements are careful, and your lines straight, before moving on to the next step, otherwise things will get wonky. Or don’t, it’s your project.

Step 3: Cut
Yep.
Use a miter, if you have it, to make sure your cuts stay nice and straight. On a smaller piece like a strip of balsa, it won’t make any kind of difference, but on these half-inch timbers, it will be noticeable if you get too far off the rails.
Honestly I started to get very bored sawing every individual dowel, so I put as many in the miter as I could, then wedged them in so they wouldn’t move around as I cut. I felt very smart.

Step 4: Assemble the Frames
Again, I’m taking advantage of some of the properties inherent to my materials: in this case, my laser-cut wall pieces are definitely straight. So instead of trying to join my half-inch beams to make perfect squares, I’m just going to line up their straight edges with the straight edges of the wall.

I started with all of the 2” dowel pieces, which I chose for my verticals. For as many pairs of 1” pieces I had cut, I glued the 2” dowels to both sides of the same face of one wall piece - these will end up being square pieces. It was as simple as lining up the outer edge of the wall piece with the corresponding edge of the beam, and dropping a bit of superglue in a corner. It bonds instantly, and you can move right on to the next part. I finished the squares by gluing in the 1” pieces, since they were practically done already.
For the sides of the larger pieces, I just kept gluing the 2” verticals to one side of each laser-cut square, til I ran out. These formed like an art deco “L” shape, which I stacked in fun configurations because why not.


Then I paired the “L” pieces up, since each wall is going to have two closing verticals, and joined the pairs with the 3” and 5” pieces. On each piece, I made sure that the horizontals were nicely lined up with the edge of the wall before gluing.

Step 5: Add the Walls
Yeah so this is like 3/4 done already? Just plop (carefully) those laser squares down where they go.

Step 6: Sand
Despite your (my) best efforts, there’s no way every cut or placement you make is going to be perfect. It’s fine - that’s what sandpaper is for. Get yourself a cardboard box, toss some 200-grit sandpaper in the bottom, and sand away.

The box serves three purposes: 1) it contains all your sawdust so it doesn’t get everywhere; 2) it gives you a nice level surface to sand on so your walls stay mostly square; 3) it contains all your sawdust! You can keep this to mix with glue to fill gaps or add texture to other things.
Give these a brush or a quick wipe-down to get off any lingering sawdust, and then it’s on to the final step -
Step 7: Paint
Yeah - here we are, voila! I used gesso, tinted with black craft paint, and thinned slightly with water to give the pieces a nice, uniform grey. I want these to stand out a bit from the wet-erase map - I figured that the ground should match/“be the same material,” but a built thing shouldn’t. But I didn’t want to go with flat black because that’s kinda… jarring. So, grey.

Black Box Walls: Evaluation
Immersion: 7/10 - you really get a great feeling of space - streets, corners - what’s behind the wall?
Interaction: 10/10 - take cover take cover take cover take cover take cover
Entertainment: 8/10 -

Overall Impact: 8.5/10
Durability: extreme
Repeatability: usable in so many ways, so many forms! One of those 6” pieces could be a bridge, or you could build stairs, or lay them out to make a dais, or… And honestly? Easy as. not pie. pie is complicated. Why is that the phrase? Easy as carrots. Carrots are easy.
Cost: $25 for 20 or so pieces of varying lengths
Final Thoughts
So they also had a bunch of 1” squares and 1”x2” rectangles that I thought could be kinda fun to build, like, fences and boxes and tables and “boulders” and other general partial-cover things. I’m not going to make a specific tutorial for that because it’s all the same idea, mostly. I’m not sure what to do about doors, if anything - I haven’t decided if they’re useful, really. Let me know if you have an opinion on doors!